You can create a special sublimation glass badge or fridge magnet by making your own picture. Print it with sublimation ink. Use heat to put the design on a glass blank. Many beginners and hobbyists like this craft. Entry-level sublimation printers, such as the Epson SureColor F170, cost about $399. These printers are easy to use and not too expensive. You do not need to make big orders to begin. This process is good for small projects. It gives you bright and professional results at home.
Key Takeaways
Use special sublimation glass blanks and ink. This helps you make bright designs that last a long time. The colors will not fade or peel off.
Get your workspace and glass ready first. Clean the glass well. Pre-press it and use heat-resistant tape. This helps stop mistakes and keeps prints from looking blurry.
Pick the right design software for your project. Use images that are high-resolution, at least 300 dpi. This makes sure your prints look sharp and clear.
Set your heat press to the right temperature and time. Use about 400°F for 4 to 12 minutes. Press with medium pressure. This helps move your design safely and evenly onto the glass.
Attach magnets or pins with strong glue. Let them dry all the way. This makes your badges and fridge magnets strong and long-lasting.
Materials and Setup
Essential Supplies
You need the right tools to start your sublimation project. The correct supplies help your work look bright and last a long time. Here is what you should have:
Sublimation glass blanks: These are special glass pieces. They have a coating that holds the dye.
Sublimation paper: This is a strong transfer paper. It keeps the ink in place and lets it go when pressed.
Sublimation ink: Use ink made for your printer, like Sawgrass SubliJet-UHD. This gives you the best color and makes your design last.
Inkjet sublimation printer: Printers like the Epson 1430 or Sawgrass SG400 are good. Do not use a laser printer for this.
Heat press: Pick a press that lets you set the right temperature and pressure. This helps your design move onto the glass evenly.
Silicone mat or heat conductive pad: A silicone mat about 1/8″ thick spreads the heat well. This is important for glass.
Heat-resistant tape: This tape keeps your design in place when you press it. It does not melt from the heat.
Heat-resistant gloves: These gloves protect your hands from hot glass.
Cleaning supplies: Use lint-free cloths and alcohol wipes. These keep your glass clean and free from dust.
Safety gear: Wear gloves and eye protection. This keeps you safe from heat and chemicals.
Tip: Always use blanks and inks made for sublimation. Regular glass or ink will not work. They can ruin your project.
Workspace Preparation
A clean and tidy workspace helps you do better work. It also helps you avoid mistakes. Follow these steps for the best results:
Pre-press your glass blanks to get rid of moisture. Moisture can make blurry spots or faded areas.
Wipe the glass with a lint-free cloth. Dust or lint can leave marks on your finished piece.
Keep your sublimation paper in a cool, dry place. Humidity can change how the ink moves.
Set your heat press before each use. Even small changes in temperature or pressure can change your results.
Keep your inks closed and away from light. Shake the ink cartridges gently before you use them. This keeps the colors even.
Supply | Purpose |
|---|---|
Sublimation glass blank | Holds the design after transfer |
Sublimation paper | Transfers ink to the glass |
Heat press | Applies heat and pressure |
Silicone mat | Spreads heat evenly |
Heat-resistant tape | Secures design during pressing |
Note: Good preparation means you make fewer mistakes. Your sublimation glass badges and fridge magnets will look better.
Design and Print
Design Software
You need good design software to make cool artwork for your sublimation projects. Different programs have different tools. Some are best for editing photos. Others help you make logos or vector art. Here is a table that shows some popular choices:
Software | Key Features | Pros | Cons | Pricing |
|---|---|---|---|---|
Adobe Photoshop | Raster editing, photo retouching, plug-ins | Industry standard, many tutorials | No vector design support | From $20.99/month |
Adobe Illustrator | Vector design, scalable graphics, typography | Leading vector tools, versatile | Not for raster graphics | From $20.99/month |
CorelDraw | Vector and photo editing, templates | Supports many file types, strong resources | Windows-only standard version | From $39/month |
Inkscape | Free, vector drawing, SVG/PNG support | Free, open-source, scalable designs | Outdated interface, slower speed | Free |
GIMP | Free, raster image editing, plug-ins | Free, powerful editing, many plugins | Steep learning curve, no CMYK | Free |
Canva | Drag-and-drop, template library, cloud-based | User-friendly, free version available | Limited advanced features | Pro $12.95/month |
Procreate | iPad exclusive, hand-drawn tools, brush library | Great for touch and Apple Pencil | iPad only | One-time purchase |
Pick a program that fits what you want to do. If you want to work with photos, try Photoshop or GIMP. If you want to make logos or text, Illustrator, CorelDraw, or Inkscape are better. Canva is simple and has lots of templates. Procreate is fun if you like drawing on an iPad.
Tip: Try out free versions first. This helps you find what you like.
Image Quality
Good image quality makes your sublimation glass badge or fridge magnet look awesome. Always use high-resolution images. Here are some tips:
Pick images that are at least 300 dpi. This makes your prints sharp and clear.
Use PNG files for bright colors and smooth edges.
Make your design the right size for your blank. For example, use 16″x12″ for a cutting board or match your badge or magnet size.
Edit and check your image in your design software before you print.
Do a pre-flight check to make sure your image is ready.
Designers use these steps to stop blurry or pixelated prints. You can do the same at home for great results.
Note: Always check your image size and resolution before printing. This saves you time and supplies.
Printing Steps
Follow the right steps to print your design for sublimation. Each step helps you get a bright and lasting image on your glass blank.
Make your design in your chosen software. Use CMYK color mode for the best colors.
Mirror your image before you print. This is very important for glass items. The design will look right after you transfer it.
Print your design onto sublimation transfer paper. Only use sublimation ink and paper for the best results.
Clean your glass blank. Wipe away dust and moisture with a lint-free cloth.
Put the printed transfer paper face-down on the glass blank. Hold it in place with heat-resistant tape.
Set your heat press to the right temperature and time. For glass, use about 380°F (193°C) for 30-60 seconds. Change the pressure if you need to.
After pressing, let the glass cool before you take off the paper. This shows your finished design.
Check your work. Make sure the image is clear and the colors are bright.
If you see faded colors or ghosting, check your tape, ink, and press settings. Make sure the paper is tight and the temperature is right.
Sublimation printing puts your image inside the glass. This makes your badge or magnet last longer. It will not fade, peel, or crack. You can use this process for other polymer-coated items too.
Some artists use special tricks to make cool effects. For example, cooling the glass fast or adding texture can make new patterns. These ideas help you make unique sublimation art.
Tip: Keep your sublimation paper in a dry place. Wet paper can make your prints blurry.
Sublimation Process
Preparing Glass Blanks
You need to start with a clean glass surface. Dust, oils, or residues can stop the ink from sticking well. Use a lint-free cloth and alcohol wipes to remove fingerprints and dirt. Some people use dry ice blasting for deep cleaning. This method uses the energy from dry ice particles to knock off tough stains without scratching the glass. Studies show that dry ice blasting works well because it causes thermal shock and shear stress, which remove dirt but do not harm the glass. If you want to protect the glass during cleaning, you can use a layer of cyclododecane. This material sublimes away without leaving a trace, as long as you control the thickness and temperature. Always make sure your glass blank is dry before you move to the next step.
Tip: Always use glass blanks made for sublimation. Regular glass will not hold the ink.
Applying the Design
After cleaning, you need to place your printed design on the glass. Make sure you use sublimation paper and ink. Place the printed side of the paper face-down on the glass blank. Hold it in place with heat-resistant tape. This stops the paper from moving during pressing. Many users say that using a silicone mat helps spread the heat evenly. This step is important for a clear and bright image.
Practical results show that you must use glass blanks with a special coating. Untreated glass does not let the ink sink in. People who make sublimation glass badge projects often use a swing-away heat press for flat items. For curved shapes, like tumblers, you might need a mug press or a convection oven. Tutorials and user feedback show that these tools help you get strong, colorful designs that last.
Make sure the paper is tight and flat. Wrinkles or gaps can cause blurry spots or faded colors.
Heat Press Settings
You need the right heat, time, and pressure to transfer your design. Too much heat can crack the glass. Too little heat can make the colors look dull. Here is a table with settings from controlled experiments:
Source | Temperature | Time | Pressure | Notes |
|---|---|---|---|---|
VEVOR Guide | 400°F | 12 minutes | 40 psi | Gives bright, long-lasting prints on glass. |
Laughing Professor | 400°F | 4-6 minutes | Medium pressure | Suggests increasing pressure slowly to avoid breaking glass. Coating type matters. |
Most people use 400°F (about 204°C) for 4 to 12 minutes. Use medium pressure. Start with less pressure and increase it slowly. This helps keep the glass from breaking. Always use a silicone mat under the glass. The mat spreads the heat and protects the glass.
If you work with complex shapes, like ashtrays or clocks, you may need to adjust the settings. Curved items need even heat all around. You can use a mug press or a convection oven for these shapes. Always check the manufacturer’s instructions for your blanks.
Note: Let the glass cool before you touch it. Hot glass can burn your hands and may break if you move it too soon.
You can now see how each step helps you make a strong and colorful sublimation glass badge or fridge magnet. Good cleaning, careful design placement, and the right heat press settings all work together for the best results.
Finishing and Tips
Quality Check
You want your finished project to look professional. Start by checking the image clarity and color vibrancy. Hold your sublimation glass badge or fridge magnet up to the light. Look for sharp lines and bright colors. Make sure there are no faded spots or ghosting. If you see scratches or dull areas, check your cleaning and pressing steps for next time.
A three-phase inspection helps you keep quality high. First, check your design file for 300 DPI resolution and use the sRGB color profile. During pressing, watch for even color and good alignment. After pressing, test the surface for scratch resistance and make sure the finish feels smooth. Use this table to guide your checks:
Phase | Key Actions | Quality Metrics |
|---|---|---|
Pre-Production | Verify files, inspect materials | 300 DPI, sRGB color, clean blank |
Production | Press checks, verify registration | Color consistency, alignment |
Post-Production | Physical tests, check packaging | Scratch resistance, finish |
Tip: Always use polyester-coated blanks for the best results.
Hardware Attachment
You need to attach magnets, pins, or clock parts securely. Use strong adhesive pads or glue made for glass and metal. Press the hardware firmly onto the back of your project. Let it dry fully before handling. For pins, use a two-part epoxy for extra hold.
Mechanical tests, like the pullout test, help you know your hardware will stay in place. These tests measure how much force it takes to remove a fastener. You do not need special machines at home, but you can gently tug on the hardware to check the bond. ASTM standards guide these attachment methods, making sure your fridge magnet or badge will last.
Always let glue cure for the time listed on the package. This step keeps your hardware secure.
Care Instructions
Proper care keeps your sublimation glass badge or magnet looking new. Wipe the surface with a soft, damp cloth. Avoid harsh cleaners or scrubbing pads. Do not soak the item in water. Store your pieces away from direct sunlight to prevent fading.
Follow these tips for long-lasting results:
Clean your workspace before starting to avoid dust.
Use only high-quality sublimation paper and ink.
Secure the transfer paper tightly to prevent ghosting.
Let the glass cool slowly after pressing.
Choose blanks with a polyester coating. Clean the blank with alcohol before pressing. Use heat-resistant tape to keep your design in place. These steps help your design stay bright and durable.
Creative idea: Add names, dates, or fun graphics to personalize each fridge magnet or badge. Try different shapes or backgrounds for unique gifts.
Sublimation Glass Badge Tips
Badge Blanks
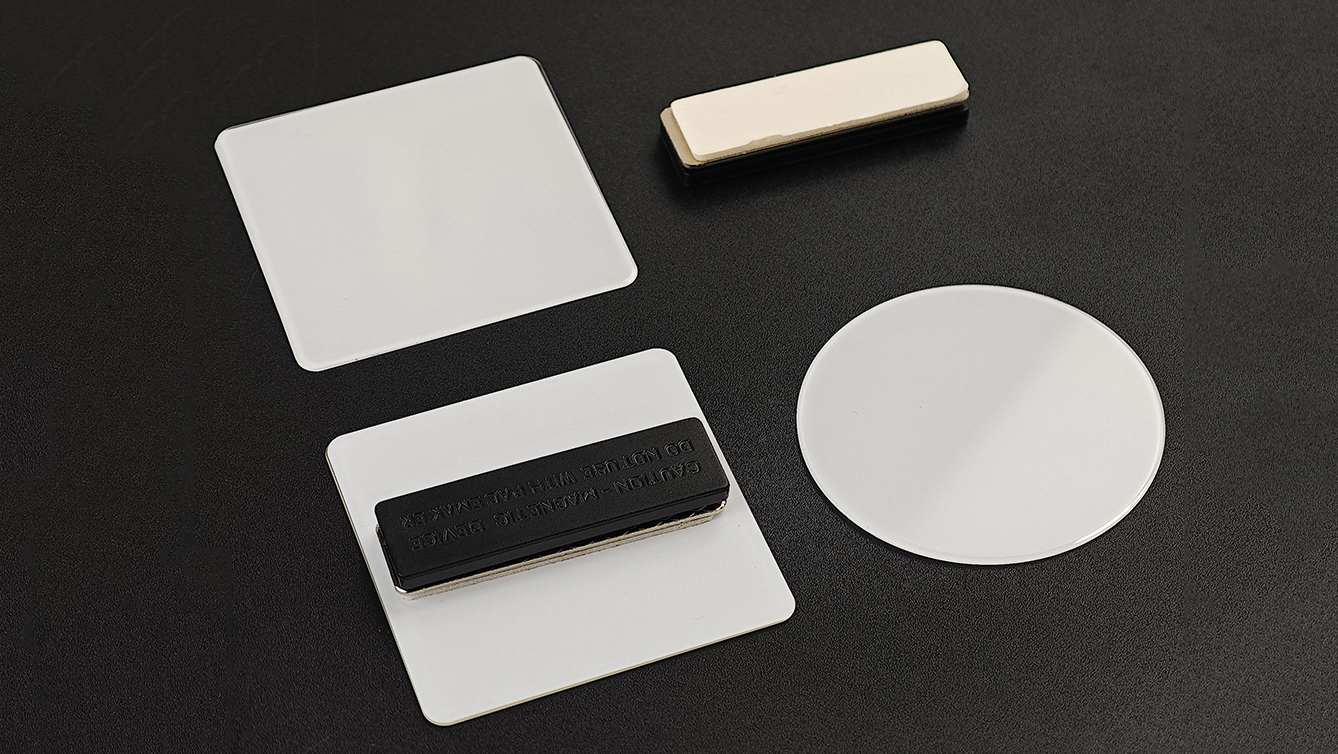
You can buy pin-type sublimation glass badge blanks online. These blanks come in different sizes. The most common size is about 1 inch wide. Some badges use a sublimated aluminum sheet that is about 0.9 inch wide. Most badge blanks have a zinc alloy base with an aluminum or glass top. This makes the surface strong and smooth for your design.
Here is a quick chart with badge blank details:
Specification | Details |
|---|---|
Size | |
Substrate Material | FRP (Fiber Reinforced Plastic) |
Finish | Matte White |
Coating | White coating for sublimation |
Unit Weight | 0.02 lbs |
Heat Press Settings | 400°F (204°C), 80-90 seconds, medium pressure |
Application Notes | Prepress 20 seconds, cool before transfer |
Many people say these badge blanks are simple to use. They also give great results. The steps are easy: print your design, put it on the blank, press with heat, and let it cool. After it cools, add the pin backing. This way works for both small and big batches.
Tip: Always check the coating on your badge blank. Only use blanks made for sublimation for the best color and strength.
Customization Ideas
You can use a sublimation glass badge for many fun projects. These badges are good for branding, big orders, and events. Add your company logo or event name to make a special gift. Many small businesses use these badges for staff name tags or uniforms.
For big orders, keep your designs simple and bold. This helps your badges look neat and easy to read. Use a template so each design fits the blank. Lining up your design is important. If your design moves, the badge may look crooked.
When you add the pin or magnet, press down hard and let the glue dry all the way. This keeps your badge safe. Test a few finished badges by gently pulling on the pin to check if it holds. A strong bond means your badge will last longer.
Note: Try new shapes or backgrounds to help your sublimation glass badge stand out at events or in stores.
You now know how to create your own designs, print them, and transfer them onto glass. Try different colors and shapes to make each project unique. You can also explore other glass sublimation projects like plates, clocks, or cutting boards. Practice helps you improve your skills. Let your creativity guide you as you make each piece special.
FAQ
How do you prevent your design from fading on glass badges or magnets?
You should use high-quality sublimation ink and blanks with a polyester coating. Store your finished items away from direct sunlight. Clean them gently with a soft cloth. This helps your design stay bright and last longer.
Can you sublimate on regular glass?
No, you cannot use regular glass. Only glass with a special polyester coating works for sublimation. Regular glass will not hold the ink. Always check the product label before you start your project.
What should you do if your image looks blurry after pressing?
Check your image resolution. Use at least 300 dpi. Make sure you clean the glass blank well. Secure the transfer paper tightly with heat-resistant tape. Adjust your heat press settings if needed.
What is the best way to attach magnets or pins to your glass project?
Use strong adhesive pads or a two-part epoxy glue. Press the magnet or pin firmly onto the back. Let the glue dry fully before you use the item. Test the bond by gently pulling on the hardware.